
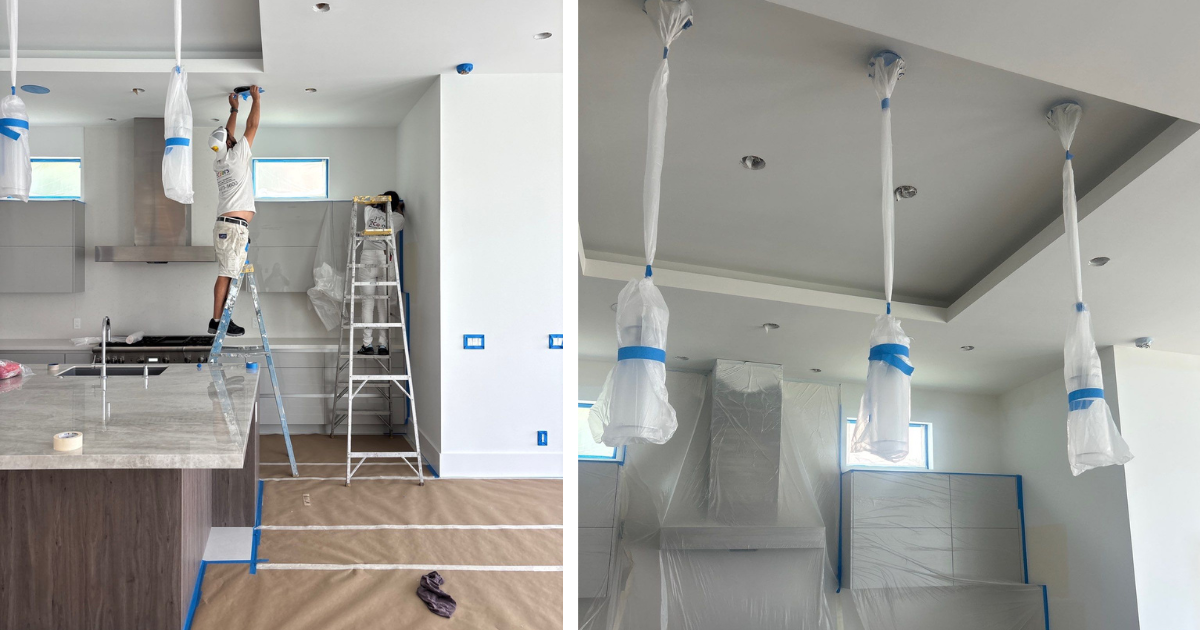
A beautifully painted room doesn’t start with a brush or roller—it starts with proper preparation.
Whether you’re updating a single bedroom or repainting your entire home, the quality of the finished result depends on the work completed before the first coat of paint is ever applied. While many homeowners focus on choosing the perfect color, professional painters know that thorough preparation is what creates smooth walls, crisp lines, and a finish that lasts for years.
At Tru Colors Contracting, every interior painting project begins with a detailed preparation process designed to protect your home, repair imperfections, and create the ideal surface for premium paint. In this guide, we’ll explain what happens before we open the paint can and why proper preparation is one of the most important parts of any interior painting project.
Why Interior Painting Preparation Matters
Interior paint is only as good as the surface beneath it.
If walls are dirty, damaged, or uneven, those imperfections will often become even more noticeable after fresh paint is applied. Skipping preparation may save time initially, but it can lead to poor adhesion, uneven finishes, peeling paint, and costly touch-ups later.
Proper interior paint preparation helps:
- Create a smoother, more uniform finish
- Improve paint adhesion
- Increase durability
- Reduce visible imperfections
- Deliver cleaner lines around trim and ceilings
- Protect your furniture and flooring
- Extend the life of your paint job
Professional preparation is what separates a high-quality finish from an average one.
Step 1: Inspecting the Room
Every project begins with a careful inspection of the surfaces to be painted.
Our team evaluates:
- Drywall condition
- Nail pops
- Settlement cracks
- Water stains
- Existing paint condition
- Holes from picture frames or shelving
- Surface texture
- Areas of previous repairs
- Trim, doors, and baseboards
This inspection allows us to identify repairs that should be completed before painting begins.
Step 2: Protecting Your Home
One of the first visible steps of any professional interior painting project is protecting your home.
Before preparation starts, we carefully cover and protect surrounding areas, including:
- Furniture
- Flooring
- Countertops
- Cabinets
- Appliances
- Fixtures
- Stair railings
- Built-in shelving
Drop cloths, masking materials, and protective coverings help keep your home clean throughout the project while minimizing disruption.
Step 3: Cleaning the Walls
Many homeowners are surprised to learn that walls should be cleaned before painting.
Over time, interior surfaces collect:
- Dust
- Dirt
- Grease
- Cooking residue
- Smoke residue
- Fingerprints
- Pet oils
- Household contaminants
These contaminants can interfere with paint adhesion and affect the final finish.
Depending on the room, surfaces may be lightly cleaned or degreased before repairs and priming begin.
This step is especially important in kitchens, bathrooms, laundry rooms, and high-traffic areas.
Step 4: Repairing Drywall and Surface Imperfections
Fresh paint highlights imperfections—it doesn’t hide them.
Before painting, damaged areas should be repaired to create a smooth, consistent surface.
Common repairs include:
Filling Nail Holes
Small nail holes from pictures, artwork, or shelving are patched and smoothed before painting.
Repairing Drywall Damage
Minor dents, dings, chips, and holes are repaired using appropriate patching materials before sanding.
Fixing Settlement Cracks
Small cracks often develop where walls, ceilings, and corners naturally shift over time.
Repairing these areas helps create a seamless finished appearance.
Repairing Nail Pops
Drywall nail pops should be corrected before repainting to prevent them from showing through the new finish.
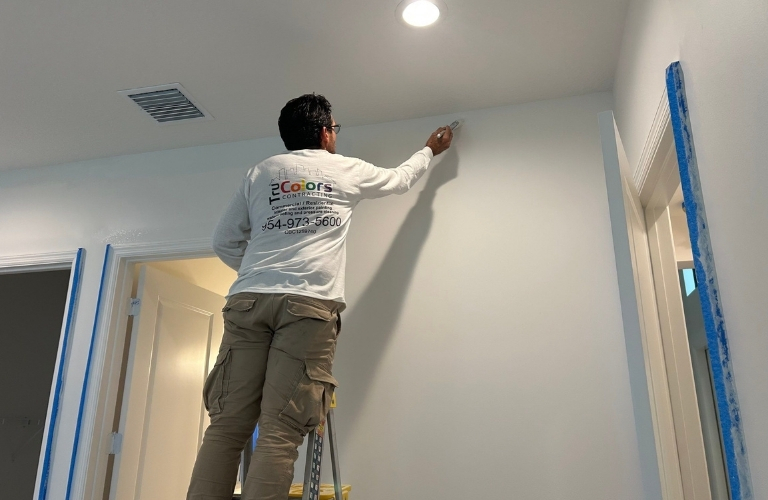
Step 5: Sanding the Surface
Sanding is one of the most important preparation steps for achieving a professional-looking finish.
Proper sanding helps:
- Smooth repaired areas
- Feather patch edges
- Remove minor imperfections
- Improve paint adhesion
- Create a uniform surface
Even previously painted walls often benefit from light sanding before repainting.
Step 6: Caulking Trim and Gaps
Interior caulking isn’t just for appearance—it also creates cleaner transitions between surfaces.
Small gaps may develop over time between:
- Baseboards
- Crown molding
- Door casings
- Window trim
- Built-in cabinetry
Applying fresh caulk where needed creates crisp, finished lines and helps eliminate visible gaps after painting.
Step 7: Priming Before Painting
Primer is often one of the most overlooked parts of interior painting.
While some repaint projects may not require full priming, many situations do.
Primer is commonly recommended for:
- New drywall
- Drywall repairs
- Water stains
- Color changes
- Bare wood
- Patched surfaces
- High-traffic areas
Using the correct primer helps:
- Improve adhesion
- Seal porous surfaces
- Create even color coverage
- Reduce flashing over repaired areas
- Improve durability
Skipping primer when it’s needed can result in uneven sheen, visible patches, or additional finish coats.
Step 8: Preparing Trim, Doors, and Woodwork
Interior painting often includes more than just the walls.
Trim, doors, baseboards, and moldings require their own preparation process.
This may include:
- Cleaning
- Light sanding
- Filling imperfections
- Caulking joints
- Spot priming
Proper preparation helps create the smooth, factory-like finish homeowners expect on trim and doors.
Step 9: Dust Control and Clean Work Areas
Preparation work naturally creates dust, especially during sanding and drywall repairs.
Professional painters take steps to minimize dust throughout the project by:
- Cleaning sanding residue
- Protecting adjacent rooms
- Using dust-control methods
- Vacuuming surfaces before painting
- Wiping walls prior to primer and paint
A clean surface allows the finish coats to bond properly and helps produce a smoother final appearance.
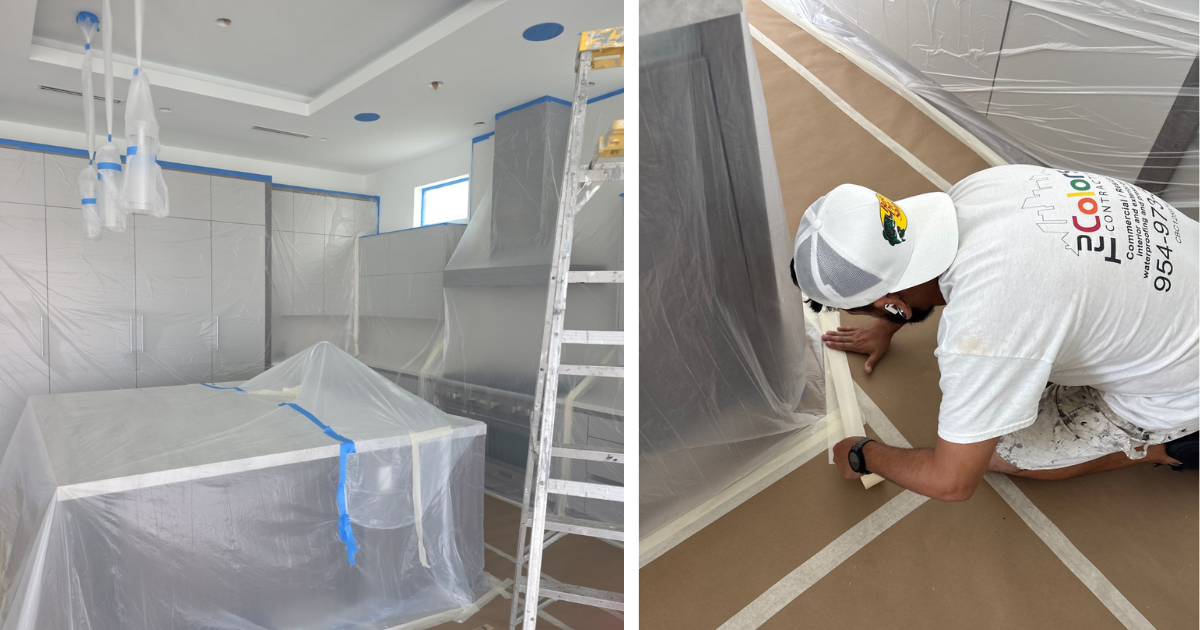
Every Room Has Different Preparation Needs
Not every room requires the same preparation.
For example:
Kitchens
Grease and cooking residue must be thoroughly cleaned before painting.
Bathrooms
Moisture, humidity, and mildew should be addressed before applying new paint.
Living Rooms
Repairs often focus on nail holes, scuff marks, and wall imperfections.
Bedrooms
Preparation may include repairing dents, patching holes, and smoothing textured repairs.
High-Traffic Areas
Hallways, stairwells, and entryways typically require more cleaning and surface repairs due to everyday wear.
Why Homeowners Shouldn’t Skip Preparation
Some painting estimates seem less expensive because they include very little preparation.
While this may reduce the initial cost, inadequate prep often leads to:
- Visible wall imperfections
- Uneven finishes
- Peeling paint
- Reduced durability
- More frequent repainting
- Higher long-term costs
Investing in proper preparation helps ensure your interior painting project delivers lasting value.
Frequently Asked Questions About Interior Painting Preparation
Do professional painters fill nail holes before painting?
Yes. Small holes, dents, and minor imperfections are typically repaired before painting to create a smoother finished surface.
Do walls need to be cleaned before painting?
Yes. Dust, grease, fingerprints, and other contaminants can affect paint adhesion and should be removed before painting begins.
Is sanding always necessary before interior painting?
Not every project requires extensive sanding, but light sanding is often recommended to improve adhesion and smooth repaired areas.
Do I need to move all my furniture?
In many cases, furniture can be moved toward the center of the room and carefully protected with clean coverings while painting is completed.
How long does preparation take?
Preparation time depends on the size of the project and the condition of the walls. Homes with damaged drywall, significant repairs, or extensive trim work generally require more preparation before painting can begin.
Why Choose Tru Colors Contracting for Interior Painting?
At Tru Colors Contracting, we believe exceptional interior painting begins with exceptional preparation.
Our experienced team takes the time to properly inspect, repair, clean, sand, prime, and protect every surface before applying premium coatings. This attention to detail helps deliver smoother finishes, longer-lasting results, and a cleaner overall experience for homeowners.
Whether you’re refreshing a single room, updating your entire home, repainting ceilings, or refinishing trim and doors, we tailor our preparation process to the unique needs of your property.
We proudly provide professional interior painting services throughout Broward, Palm Beach, Martin, St. Lucie, and Miami-Dade Counties, including Fort Lauderdale, Boca Raton, Coral Springs, Parkland, Delray Beach, West Palm Beach, Jupiter, Stuart, Port St. Lucie, and Miami.
If you’re planning an interior painting project, contact Tru Colors Contracting today to schedule a consultation and discover the difference proper preparation makes.
Continue Reading Our Surface Preparation Series
Learn more about the preparation methods behind our painting and restoration services:
- The Importance of Proper Surface Preparation Before Any Painting or Restoration Project
- Why Proper Prep Work Is Essential Before Exterior Painting
