
No homeowner ever wants to deal with water damage, but it can occur due to various reasons such as natural disasters, burst pipes, or internal flooding from an overflowing toilet or malfunctioning appliance. When water damage happens, quick cleanup and proper repairs are the best ways to prevent long-term problems.
While the temptation to repaint damaged walls or ceilings as quickly as possible may be strong, don’t rush the process. Water damage requires more than cosmetic fixes—repairing and prepping surfaces properly before painting ensures that your home not only looks good but is also protected from further damage.
South Florida’s subtropical climate, with heavy rains, high humidity, and the threat of hurricanes, makes homes more vulnerable to water damage. The region often experiences intense downpours, especially during the rainy season from May to October, which can lead to roof leaks, flooding, and moisture buildup in walls and floors.
Additionally, high humidity levels can prevent proper drying, prolonging the effects of water damage and increasing the risk of mold growth. When repairing water damage in South Florida, it’s crucial to consider weather patterns and humidity, ensuring the structure is fully dried and treated before repainting to prevent future issues.
At Tru Colors Contracting we understand the challenges of living in South Florida and the effects the weather can have on our homes. Read on for a step by step guide to reviving your home after water damage.
Step 1: Dry Out the Affected Areas
Before making any repairs, it’s crucial to completely dry out the affected areas. This step cannot be skipped. If moisture remains in the walls, ceilings, or floors, it can create a breeding ground for mold and mildew, leading to potential health hazards and further structural damage.
Start by increasing airflow in the room. If the weather permits, open windows and doors to allow fresh air to circulate, which helps dry out the space. However, if the outdoor humidity is high, it’s better to keep windows closed and rely on dehumidifiers and air movers like industrial fans to dry the room. Air movers accelerate the evaporation process, while dehumidifiers reduce moisture levels in the air and draw water out of porous materials like drywall and carpet.
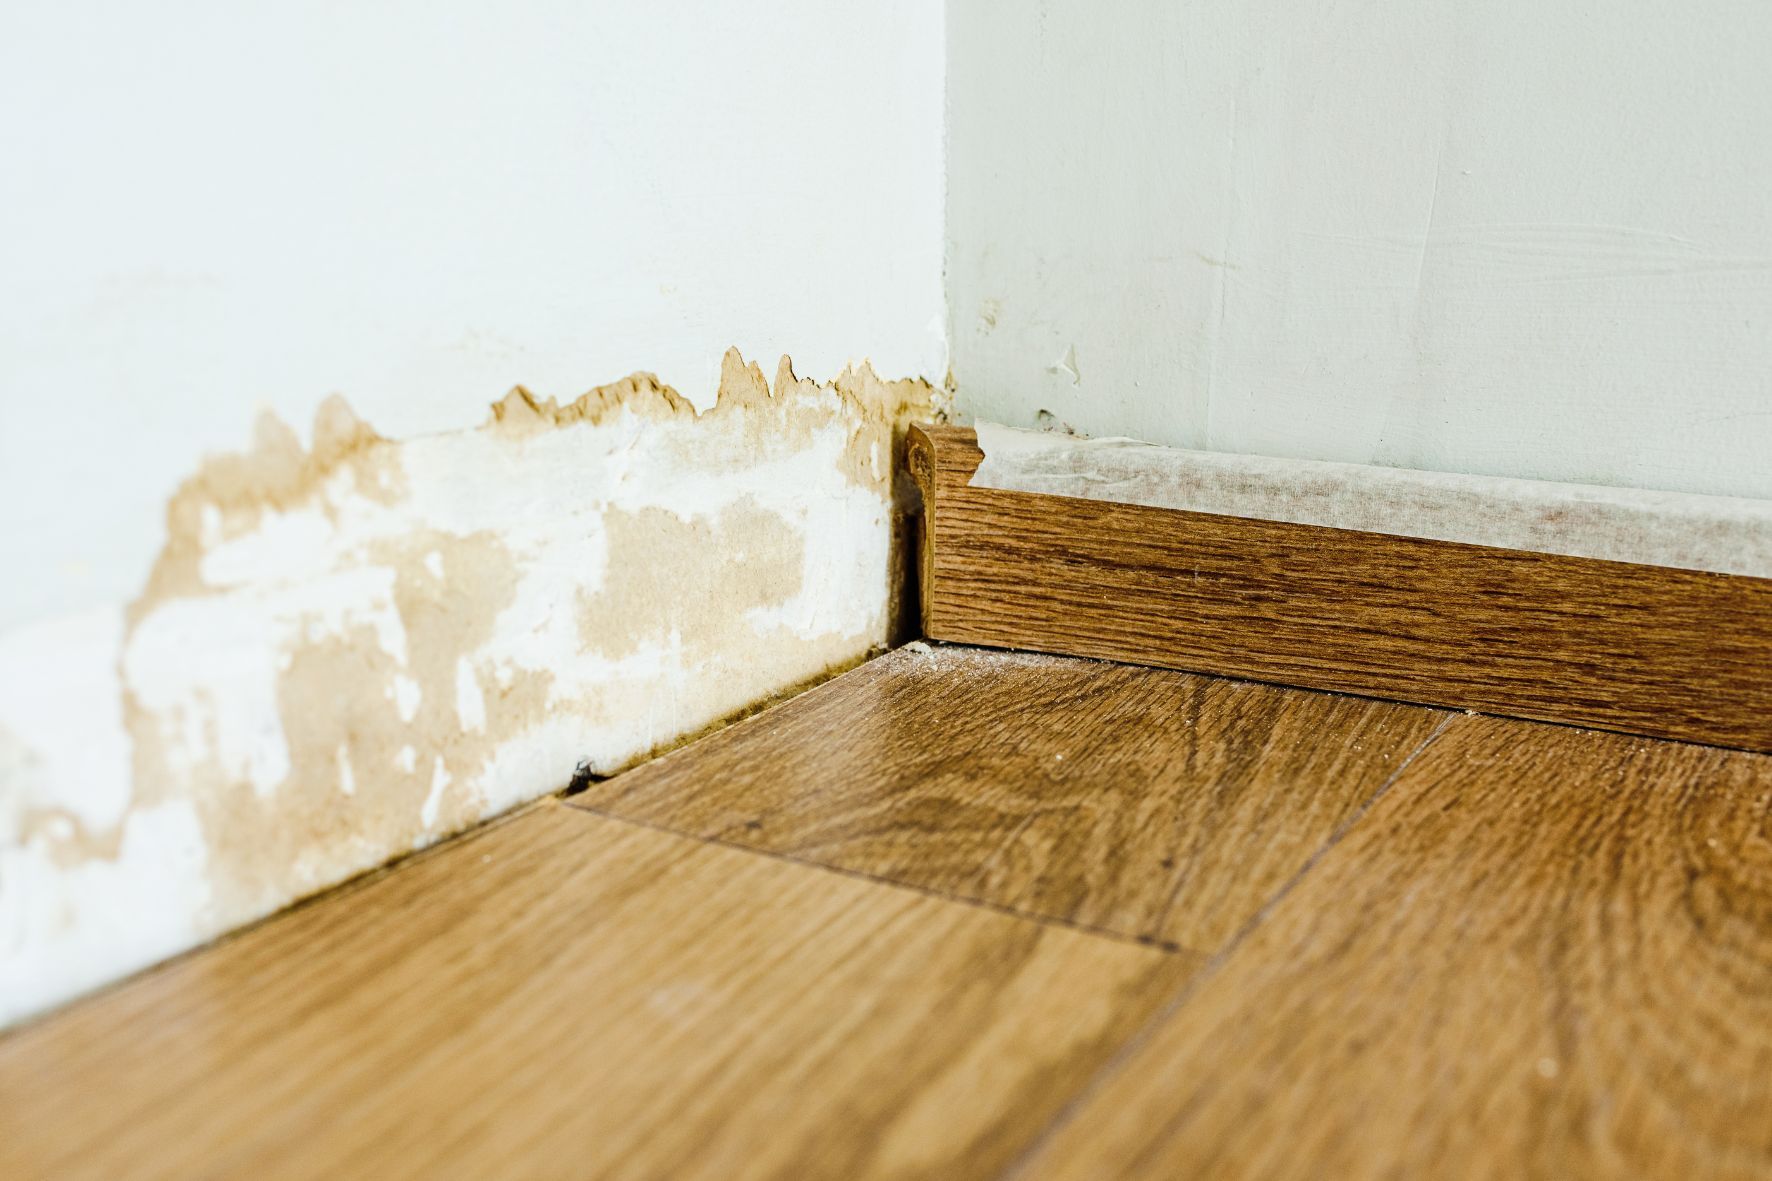
Step 2: Inspect Molding and Trim
Water damage can sometimes be subtle, particularly around molding and trim, which often look like solid wood but may be made from composite materials. These materials tend to absorb water like a sponge, which can lead to hidden damage.
Visually inspect the molding and trim for signs of discoloration, swelling, or warping. Feel for soft or spongy areas, which indicate water exposure. Pay special attention to areas near windows, doors, and plumbing fixtures, as these are common points of entry for water. Use a flashlight to highlight changes in texture or color, and look for any peeling paint or bubbling, which can indicate underlying water damage.
Step 3: Check for Ceiling and Floor Damage
Water often spreads far beyond the initial point of entry, and even if you’ve dried the walls, there could be hidden damage in the ceiling or floors. Waterlogged drywall can wick moisture upward, leading to sagging ceilings or wet spots below. Check the ceiling for cracks, bubbling paint, or sagging areas, which are signs of potential water damage. Musty smells are another clue that moisture may still be present.
Similarly, inspect the floors for signs of warping, swelling, or soft spots. Tile flooring may loosen or crack, while hardwood may exhibit cupping or crowning. Listen for creaks or popping sounds as you walk across the floor—these can indicate that the subfloor or joists have been affected by water damage.
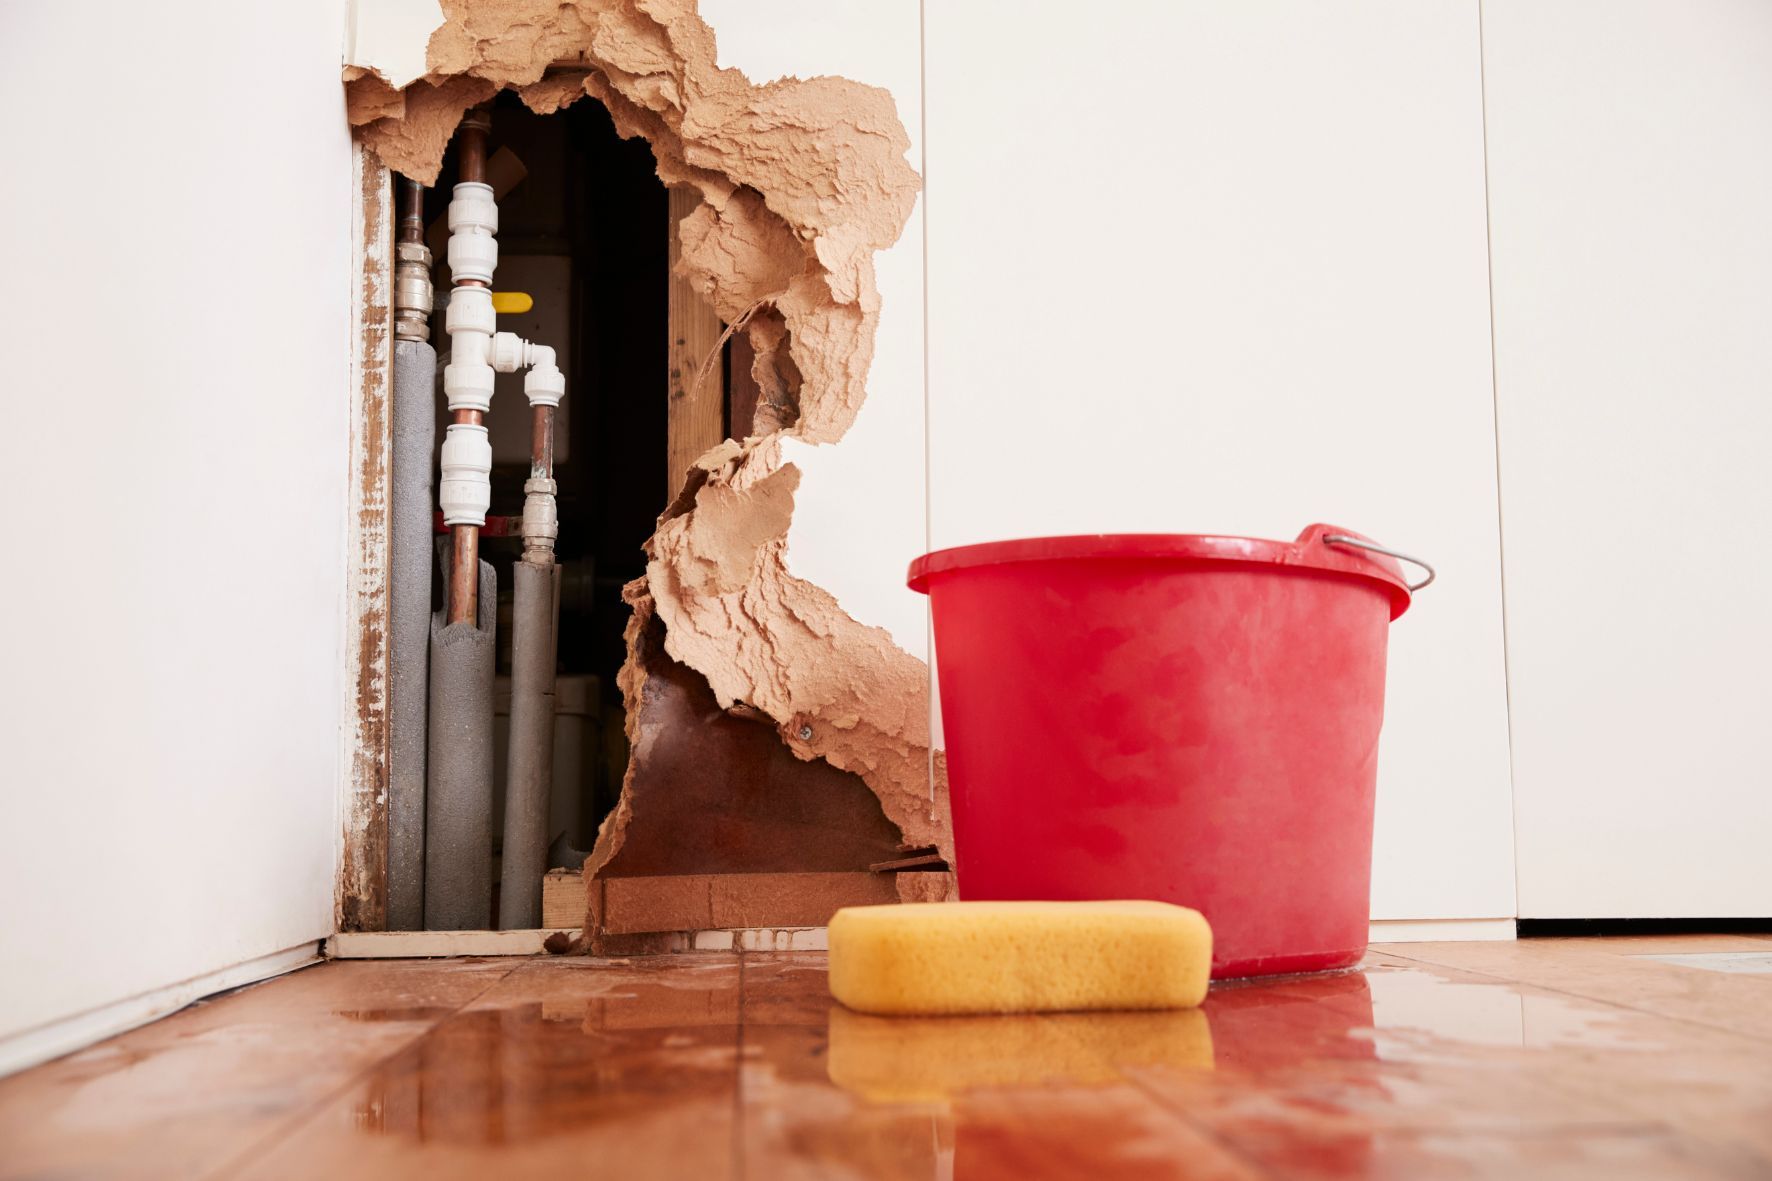
Step 4: Address Hidden Water Damage
Sometimes, water damage isn’t visible to the naked eye, especially if it’s hidden behind walls. A musty smell or mildew odor, like the scent of an old basement or damp wood, may indicate that water has infiltrated the structure of your home. If this is the case, you may need to investigate further.
To assess hidden damage, you can use a moisture meter to test for dampness without having to tear down walls. If the meter shows elevated moisture levels, you may need to open up a small section of the wall to check for mold or water damage. If you’re unsure, consult a mold remediation specialist to ensure proper handling.
Step 5: Repairing Damaged Walls and Surfaces
Once you’ve dried out the area and inspected for hidden damage, it’s time to repair the affected surfaces. If the water damage is extensive, such as sagging drywall or warped structural components, it’s best to hire a contractor to ensure that all repairs comply with local building codes and maintain the integrity of your home.
For less severe damage, you may be able to handle the repairs yourself. Start by sanding down bubbling or peeling paint and scraping away any defective areas with a putty knife. If there are dings or gashes in the surface, apply a layer of putty or spackling paste and sand it smooth once dry. For water stains, use a cleaning solution made of 1 gallon of water, 1 tablespoon of ammonia, 1/4 cup of vinegar, and 1/4 cup of borax. Apply the solution with a soft sponge, gently dabbing the stain.
Step 6: Removing and Replacing Damaged Drywall
If the drywall has been heavily damaged, removal may be necessary. Drywall is a porous material, making it particularly vulnerable to water damage. Signs that drywall needs replacement include cracks, buckling, sagging, or visible mold.
To remove drywall without making a mess, avoid the sledgehammer approach often shown on renovation TV shows. Instead, use a utility knife to cut cleanly through the drywall. Score the corners of the wall first, then cut away sections with controlled pressure. Use a drill to remove any screws, and a stud finder to locate hidden screws before drilling. Once all screws are removed, you can tear away the drywall in neat sections.
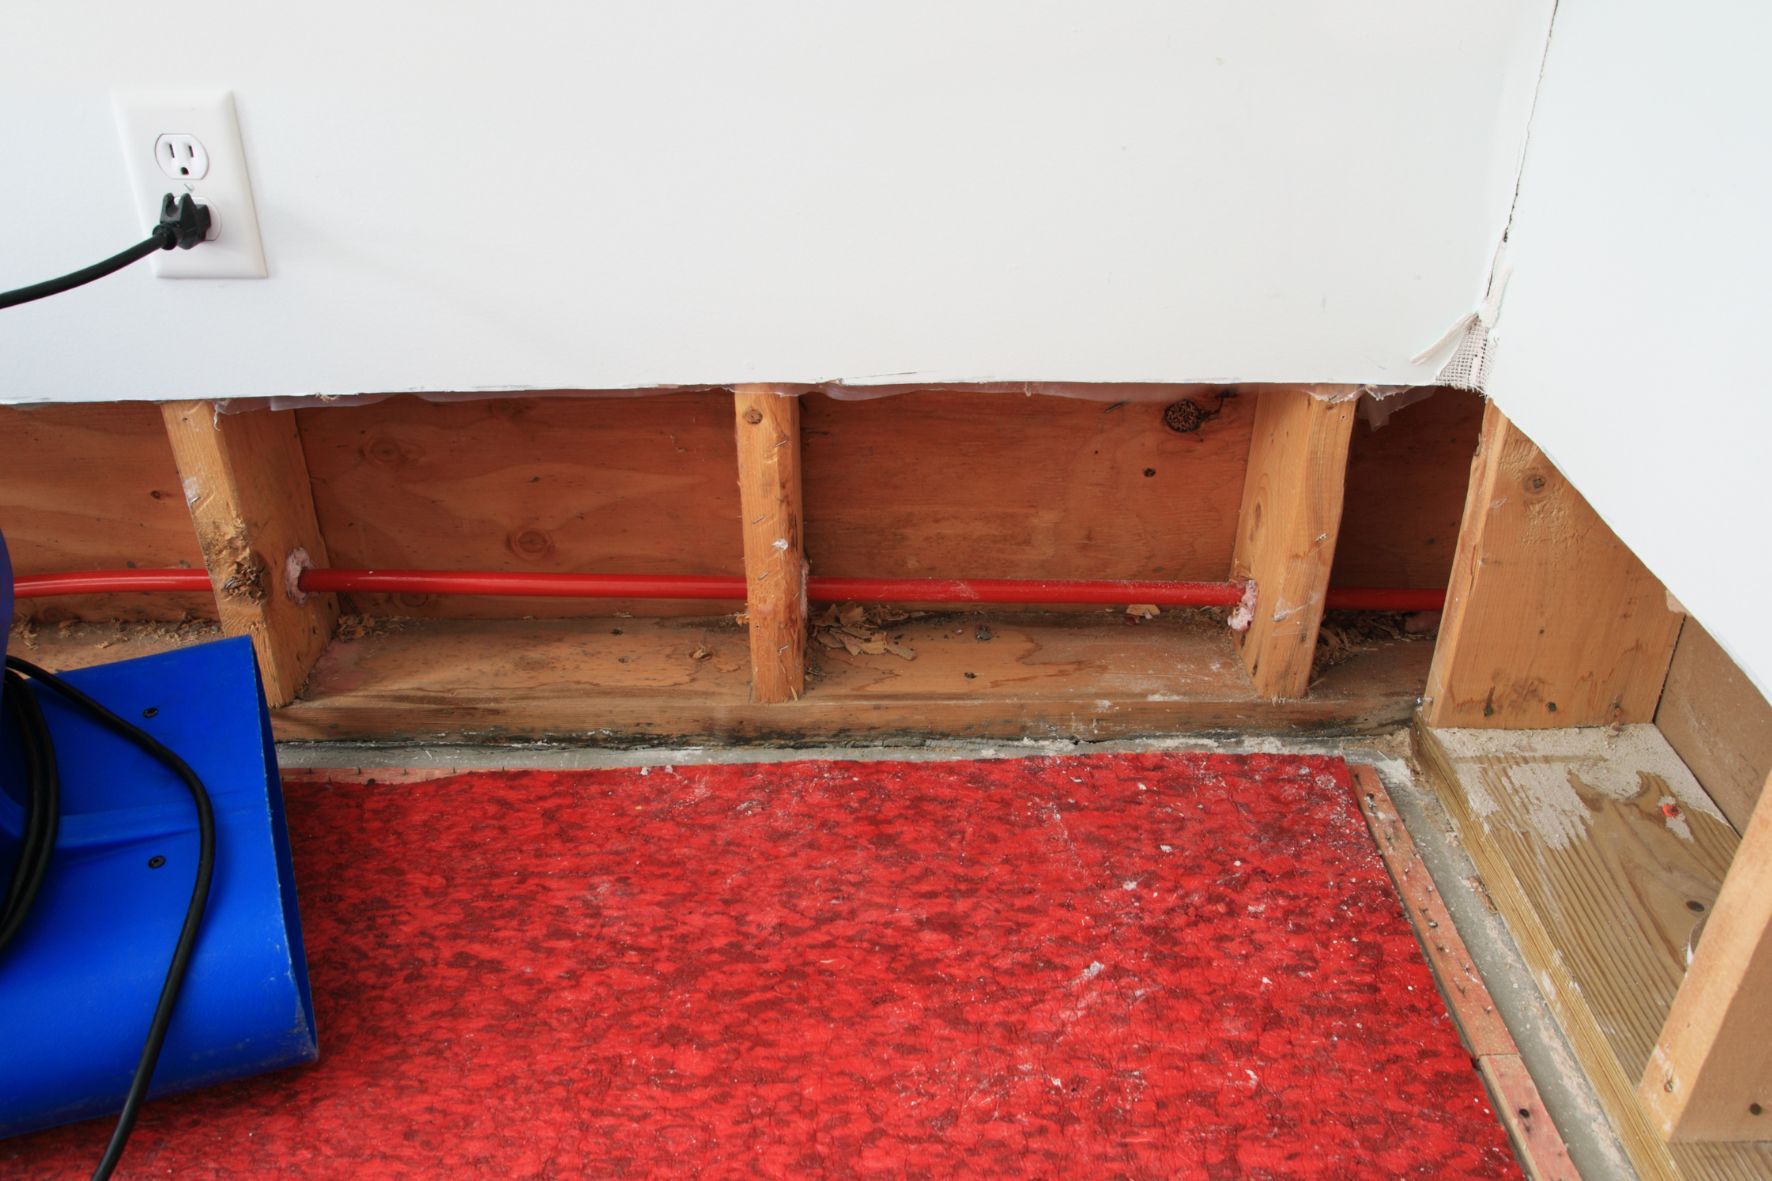
Step 7: Check and Replace Damaged Insulation
Once the drywall is removed, inspect the insulation behind it. Water-damaged insulation not only loses its thermal efficiency but also creates an ideal environment for mold growth. Inaccessible areas like attics and basements are particularly prone to this kind of damage.
Water damage causes fiberglass insulation to lose its fluffiness, while cellulose or foam insulation may warp or discolor. Look for visible signs of mold, such as black, green, or yellow spots. If you’re unsure whether the insulation has been compromised, consider hiring a professional to use thermal imaging or other non-invasive techniques to assess the damage.
Step 8: Hanging New Drywall
With the damaged materials removed, it’s time to install fresh drywall. Measure the area and cut drywall sheets to size, using a utility knife to score and snap the pieces. Attach the drywall to the ceiling joists using drywall screws, placing the screws about 16 inches apart. Ensure that the screw heads are slightly recessed but not so deep that they break the paper surface.
Apply joint tape and compound to seams, corners, and screw indentations, smoothing it out to create a seamless finish. After the compound dries, sand the surface lightly to ensure it’s flush with the wall.
Step 9: Install New Baseboards and Trim
Once the drywall is complete, you can move on to installing baseboards and trim. If the original trim wasn’t damaged, you can reuse it by cleaning and repainting. However, if you need to replace it, be sure to measure carefully and cut the trim at 45-degree angles for the corners.
Paint the trim before installing it to avoid drips on freshly painted walls. Secure the baseboards and trim using a nail gun or finishing nails, and caulk any gaps between the trim and the wall or floor.
If you prefer to use a professional painting company to re paint your newly repaired walls or ceilings Tru Colors Contracting are your local South Florida team of experts. See our work here !
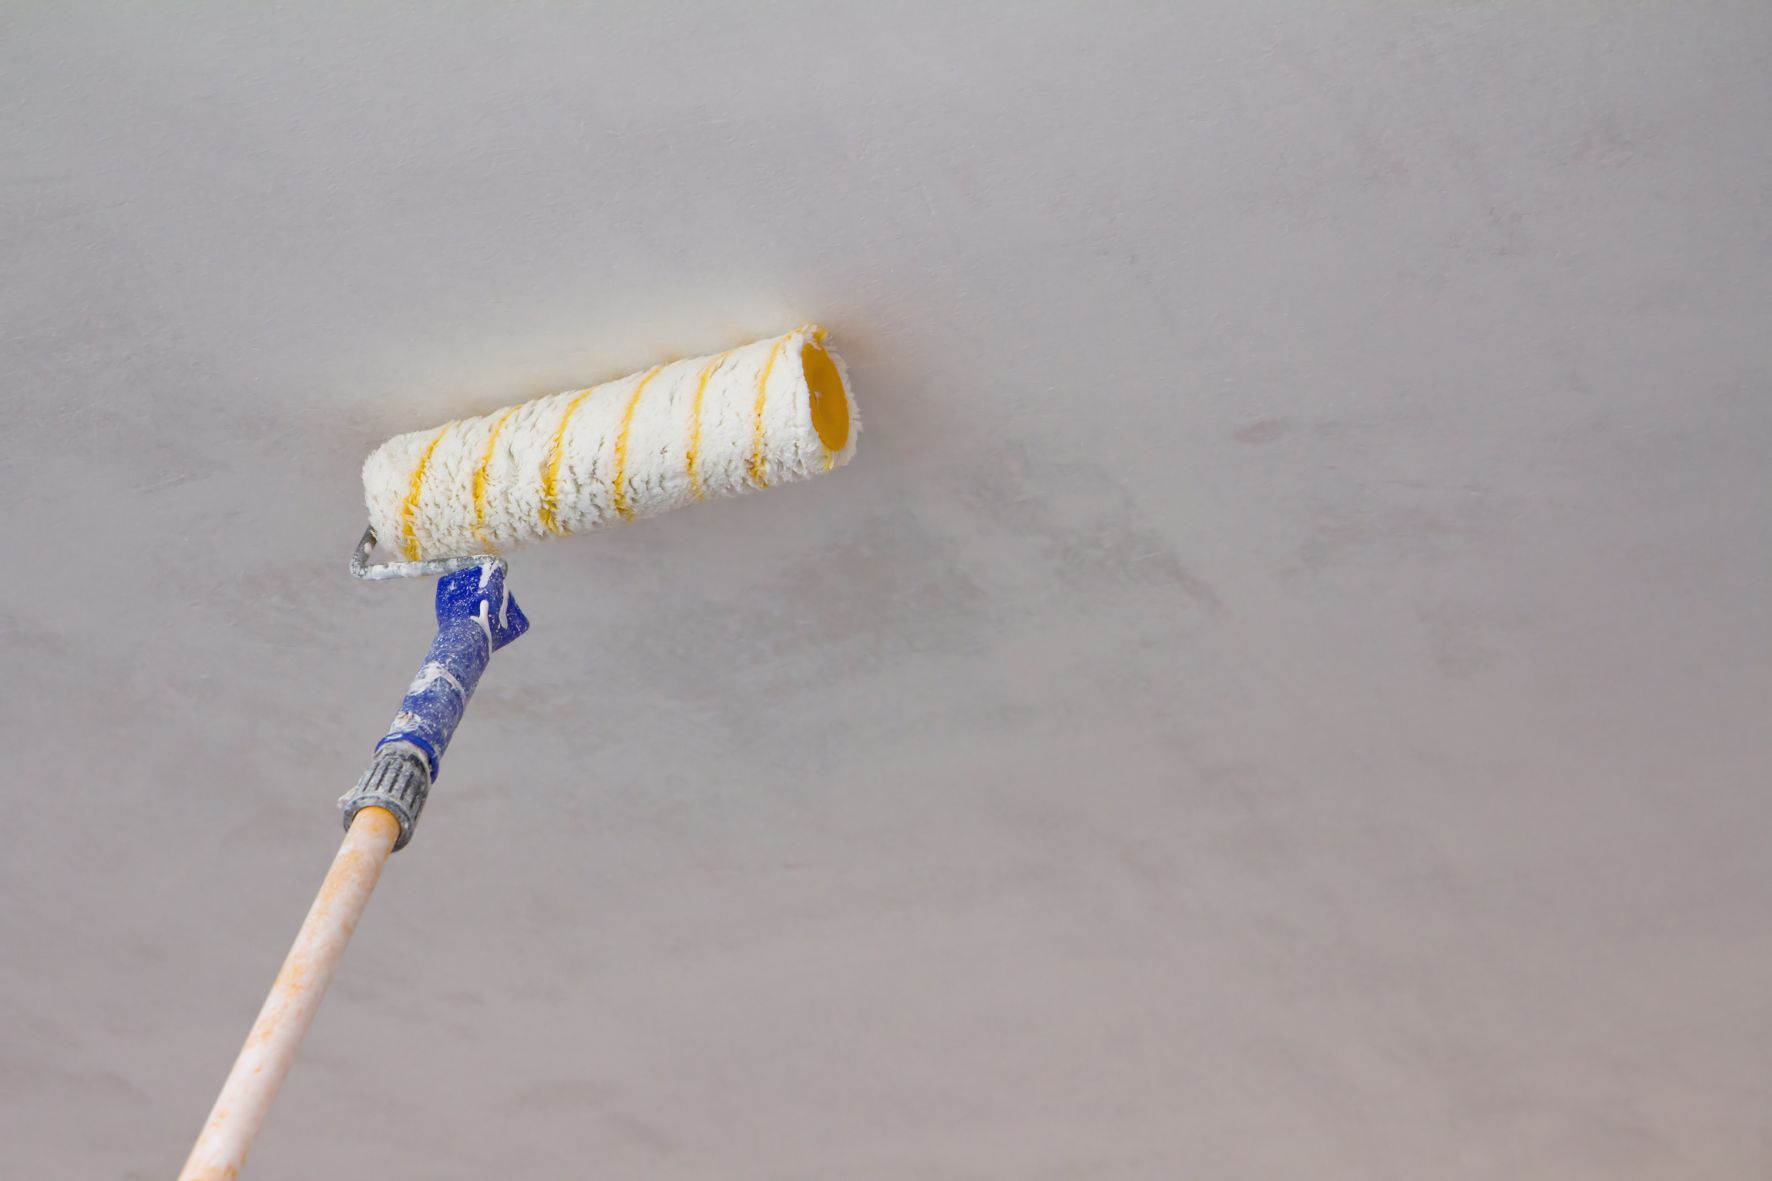
Step 10: Choose the Right Primer
Before applying paint, selecting the right primer is key to achieving a long-lasting finish. While some paints come with a built-in primer, these are not sufficient for repairing water-damaged walls. A separate primer will block stains, even out the surface, and increase the paint’s longevity.
For areas prone to moisture, such as bathrooms, choose an anti-mold primer. These primers prevent mold and mildew from developing behind the paint. If you’re dealing with particularly stubborn water stains, an oil-based primer may offer better coverage than water-based primers.
Step 11: Prep Walls Before Painting
Proper wall preparation is essential to ensure a smooth, professional-looking paint job. If you’re painting over existing paint, fill in any cracks or holes with spackling paste, and sand the surface with fine-grit sandpaper to even it out. For new drywall, make sure the joint compound is flush with the wall and sand it down as necessary.
After sanding, clean the walls thoroughly to remove any dust or debris. Mix a solution of mild detergent with water, and wipe down the walls with a soft sponge. Allow the walls to dry completely before moving on to painting.
Step 12: Matching Paint Colors
When it’s time to paint, matching the color of the existing paint can be challenging, especially if the paint has faded over time. If you don’t know the color or brand of paint already on the walls, remove a small chip and take it to a paint store with color-matching technology. This will ensure a close match to the original paint and help avoid noticeable differences between old and new sections.
If repainting the entire room, the matching process becomes less critical, and you can focus on choosing a paint that complements your style and décor.
Repairing water damage is a detailed, multi-step process that involves more than just repainting. From drying out the area and inspecting for hidden damage to installing new drywall and priming surfaces, following these steps ensures a professional-looking finish that will protect your home from future issues. By taking the time to address water damage correctly, you safeguard your home’s structural integrity and create a safe, healthy environment for you and your family.
Why Choose a Professional Company Like Tru Colors Contracting for Water Damage Repairs?
When it comes to water damage repairs, hiring a professional company like Tru Colors Contracting ensures high-quality, long-lasting results. With over 15 years of experience in South Florida, Tru Colors Contracting understands the unique challenges posed by the region’s climate and specializes in thorough repairs and restoration.
From proper surface preparation, moisture control and even waterproofing, our team is equipped to handle all aspects of water damage remediation. Trusting experts guarantees that your home is repaired efficiently and effectively, reducing the risk of further damage or mold growth.
Contact Us today to discuss your project!
